
Chimney flashing problems are one of the most common reasons water gets into the roof area around a masonry chimney. Flashing is the metal detail installed where the chimney meets the roof. Its job is simple but important: direct rain, snowmelt, and runoff away from the joint between the roof and the chimney. When flashing fails, water can enter behind the chimney, stain interior ceilings, damage roof sheathing, weaken masonry, and create hidden moisture problems.
For Toronto and GTA homeowners, chimney flashing problems are especially worth watching because local weather puts rooflines under pressure. Heavy rain, snow, ice, wind, freeze-thaw cycles, and older brick chimneys can all expose weak spots. A small gap around flashing may not look serious from the ground, but it can let water into areas that are difficult to see until damage has already spread.
This guide explains what chimney flashing does, why flashing fails, warning signs to watch for, common repair options, and when a roofing or masonry professional should inspect the problem.
What Chimney Flashing Does
Chimney flashing seals and redirects water at the junction of the chimney and the roof. Because a chimney passes through the roof surface, it creates a natural interruption in the roof system. Without proper flashing, water would run into the gap between the chimney masonry and the roofing material.
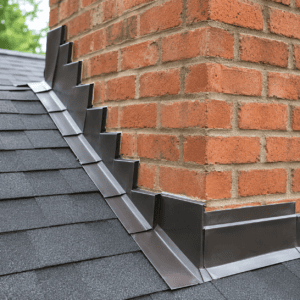
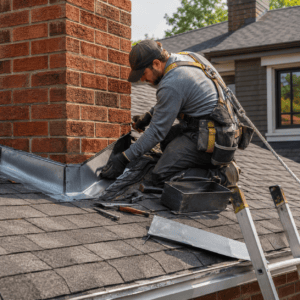
Most chimney flashing systems include more than one part. Step flashing is usually installed along the sides of the chimney where it meets the roof shingles. Counter flashing is placed into or against the masonry so it overlaps the step flashing and sheds water. There may also be apron flashing at the front of the chimney and back pan or cricket flashing behind the chimney, depending on the roof slope and chimney size.
The important idea is overlap. Flashing works by guiding water downward and outward. If the metal is loose, rusted, poorly lapped, sealed with failing caulking, or not properly connected to the masonry, water can find a path inside.
Why Chimney Flashing Problems Matter in Toronto
Chimney flashing problems matter in Toronto because water around a chimney does not stay in one place. It can travel behind brick, under shingles, into attic spaces, along framing, or down interior walls. By the time a homeowner notices a ceiling stain, the leak may have been active for some time.
Toronto’s freeze-thaw cycles make this worse. Water can enter small gaps around flashing or mortar, freeze, expand, and enlarge those gaps. Snow sitting on a roof can melt and refreeze near the chimney. Spring rain can then push more water through the same weak area. Older Toronto homes may also have brick chimneys that have been repaired multiple times, making flashing details harder to judge from the ground.
The City of Toronto provides homeowners with information on managing rain and melted snow, including private-property drainage concerns. While that page focuses on broader water management, the same idea applies at the roofline: water needs a safe path away from the home.
Common Signs of Chimney Flashing Problems
The clearest sign of a chimney flashing problem is water staining near the chimney, but not all warning signs appear indoors right away. Some signs show up outside first, especially around the chimney base, roofline, attic, or upper-floor ceiling.
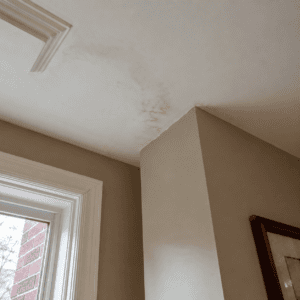
- Water stains near the chimney: Brown or yellow marks on ceilings or walls can point to roofline water entry.
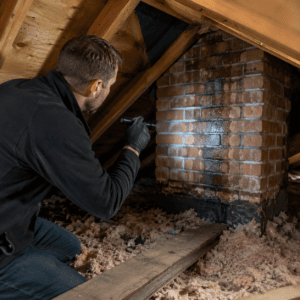
- Damp attic areas: Moisture, dark staining, or wet insulation near the chimney may suggest a flashing leak.
- Loose or lifted flashing: Metal that pulls away from the chimney can allow wind-driven rain inside.
- Cracked caulking or sealant: Sealant alone should not be the main defence, but failed sealant can expose weak flashing.
- Rust or corrosion: Rusted flashing can develop holes or weak edges.
- Damaged mortar near the roofline: Crumbling mortar can stop counter flashing from staying secure.
- Efflorescence or staining on brick: White powdery marks or dark streaks may show moisture movement through masonry.
- Recurring leaks after quick repairs: If caulking keeps failing, the real flashing detail may need correction.
If the chimney also has cracked mortar, loose brick, or visible masonry damage, the issue may not be flashing alone. A&A Masonry’s chimney repair Toronto page is a useful starting point for understanding chimney-related repairs beyond the metal flashing itself.
Common Causes of Chimney Flashing Failure
Chimney flashing usually fails because water, movement, age, poor installation, or masonry deterioration has created a weak point. Sometimes one problem causes another. For example, deteriorated mortar can loosen counter flashing, and loose flashing can allow more water into the mortar joints.
Poor installation is one of the biggest causes. Flashing must be layered correctly so water naturally sheds over each piece. If pieces are installed flat, reversed, poorly overlapped, or sealed only with caulking, the system may fail early.
Old caulking or roof cement can also cause trouble. Homeowners sometimes see a leak and apply sealant around the chimney. This may slow a leak for a short time, but it rarely solves a poorly detailed flashing system. In some cases, heavy sealant can trap moisture or hide damage.
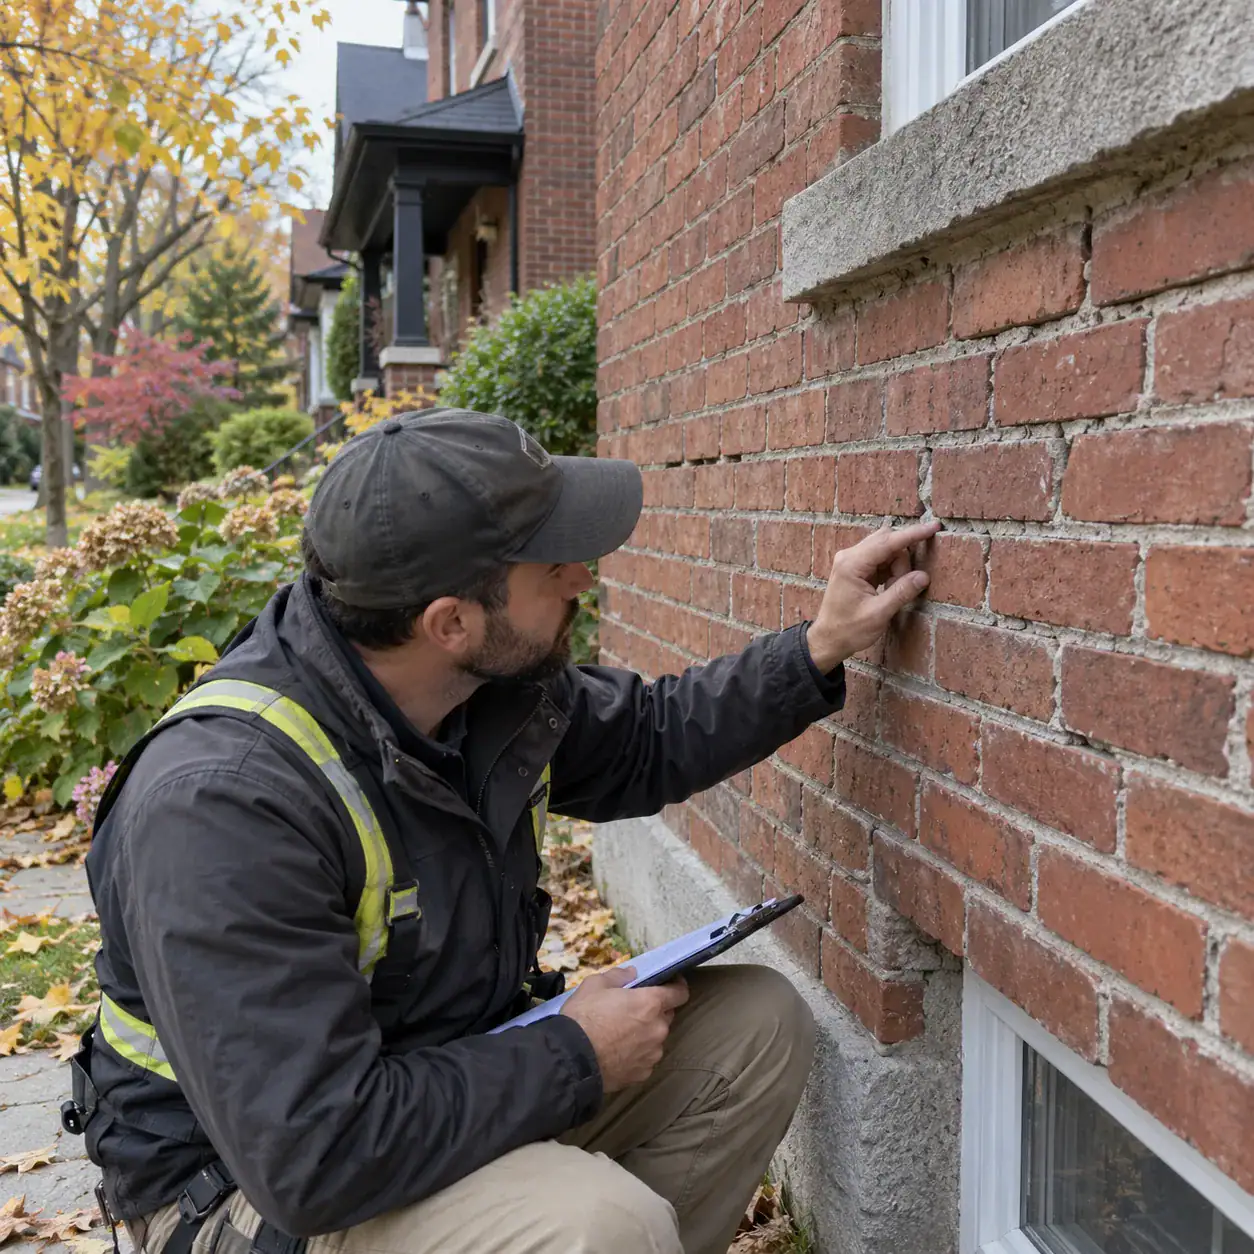
Mortar deterioration matters because counter flashing is often tied into the masonry joints. If those joints are weak or crumbling, the flashing may pull loose. Chimneys are highly exposed, so mortar near the top and roofline often weathers faster than mortar on protected walls.
Roof movement and settling can also affect flashing. Roof materials and masonry do not always move in the same way. Seasonal expansion, wind, ice, and aging roof materials can cause small gaps to open over time.
Flashing Leak or Masonry Leak: How to Tell the Difference
A leak near a chimney is not always caused by flashing. Water can enter through failed flashing, cracked chimney crowns, missing caps, open mortar joints, porous brick, damaged roof shingles, or poor drainage behind the chimney. The symptoms can look similar inside the home, so guessing can lead to the wrong repair.
A flashing leak often appears near the roofline or where the chimney passes through the roof. It may show up after wind-driven rain or melting snow. A masonry leak may appear when water enters through the chimney crown, cap, brick face, or mortar joints and travels downward through the chimney structure.
The distinction matters because the fix is different. Replacing flashing will not solve a cracked chimney crown. Tuckpointing will not fix improperly lapped metal flashing. Sealing the brick will not correct missing step flashing. A proper inspection should examine the entire chimney system: flashing, mortar, crown, cap, brick, roof surface, and drainage path.
If failing mortar is part of the problem, A&A Masonry’s tuckpointing services in Toronto page explains how deteriorated mortar joints are repaired to help protect brickwork from further moisture damage.
Why Quick Caulking Fixes Often Do Not Last
Quick caulking fixes often fail because chimney flashing is supposed to shed water through proper metal layering, not rely on surface sealant alone. Caulking can be useful in specific areas, but it should not be the primary system preventing water from entering around a chimney.
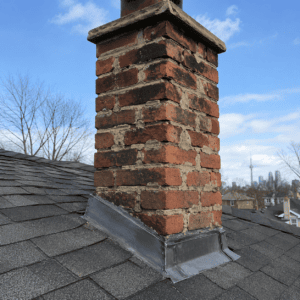
Sealant breaks down from sun exposure, temperature changes, water, ice, and movement. On a roof, those conditions are constant. A bead of caulk may close a visible gap today, but if the metal flashing is loose, rusted, poorly installed, or not secured into sound masonry, the leak can return.
This does not mean every flashing issue needs a full rebuild. Sometimes a smaller repair is reasonable. The problem is assuming every leak can be solved from the outside with more sealant. That approach can delay the real repair and allow water to keep entering behind the roof or chimney.
Common Fixes for Chimney Flashing Problems
The right fix depends on the cause of the leak. A good repair should address the weak point rather than cover it temporarily.
- Resealing small gaps: This may help when the flashing is otherwise sound, and the issue is minor, but it should not replace proper flashing.
- Refastening loose flashing: Flashing that has lifted may need to be secured properly if the metal and surrounding materials are still in good condition.
- Replacing damaged flashing: Rusted, bent, poorly cut, or badly layered flashing often needs replacement.
- Installing proper counter flashing: Counter flashing should protect the upper edge of the step flashing and connect correctly to the chimney masonry.
- Repairing mortar joints: If mortar has failed where flashing meets the chimney, tuckpointing may be needed before flashing can be secured properly.
- Improving the back side of the chimney: Larger chimneys or low-slope areas may need better water diversion behind the chimney.
- Addressing roof and masonry together: Some leaks require both roof flashing work and masonry repair to resolve the underlying issue.
If water is entering through both roofline details and exterior masonry, it may help to review A&A Masonry’s waterproofing Toronto page. Not every flashing leak is a waterproofing project, but recurring moisture issues should be addressed as part of the home’s larger water-control system.
When Permits or Code Questions May Matter
Small flashing repairs usually do not raise the same concerns as structural changes, but chimney work can become more involved when it includes rebuilding, major masonry repair, roof structure changes, or work tied to a broader renovation. When in doubt, homeowners should consult official guidance rather than assuming.
The City of Toronto provides guidance on when a building permit may be needed. Ontario’s Building Code regulation is also the official provincial reference for construction requirements. In the context of fire safety, the National Research Council of Canada publishes information on the National Fire Code of Canada.
Homeowners do not need to become code experts to repair a chimney leak, but it is smart to treat chimney work seriously. A chimney passes through the roof, connects to the home’s weather protection system, and may be part of a fireplace or heating appliance setup. If the repair goes beyond surface flashing, professional review is the safer path.
What Homeowners Can Safely Check
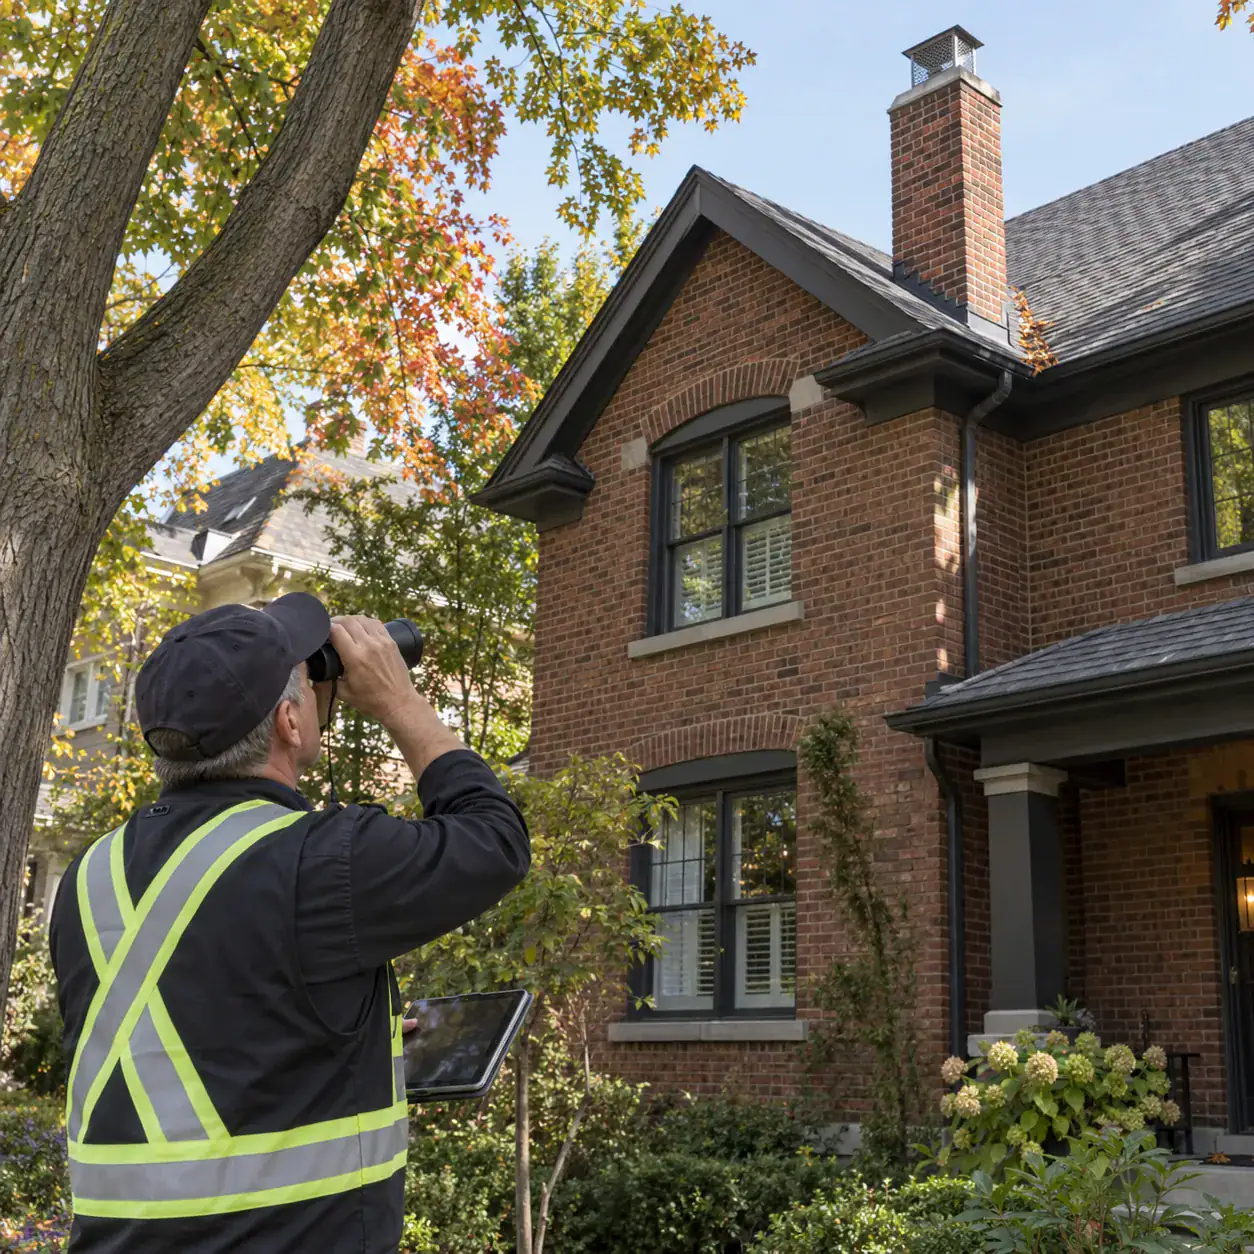
Homeowners can look for warning signs without climbing onto the roof. In many cases, a ground-level and attic-level check is enough to decide whether a professional inspection is needed.
- Look for water stains on ceilings or walls near the chimney.
- Check the attic around the chimney for damp insulation, staining, or musty smells.
- From the ground, look for loose metal, visible rust, missing pieces, or heavy roof cement around the chimney.
- Watch whether leaks appear after wind-driven rain, snowmelt, or steady rainfall.
- Take clear photos from safe locations to compare changes over time.
- Check gutters and downspouts to ensure roof water is not backing up or spilling near the chimney.
What homeowners should avoid is walking on a wet or steep roof, pulling at flashing, applying large amounts of roof cement without diagnosis, or ignoring repeated staining. Roof and chimney work can be risky, especially in winter or after rain.
What Happens If Chimney Flashing Problems Are Ignored
If chimney flashing problems are ignored, water can move into places that are more expensive to repair later. The visible leak may be only the final sign of a longer moisture path.
Over time, flashing leaks can damage roof decking, attic insulation, drywall, paint, framing, and masonry. Water can also worsen mortar deterioration around the chimney, making the flashing less secure. In winter, trapped moisture can freeze and expand, further opening joints. This cycle can turn a small roofline repair into a larger chimney and roof repair.
Ignoring leaks can also make it harder to identify the original cause. Once water spreads, stains may appear far from the actual entry point. A small, flashing gap near the roofline may appear as a stain lower down a wall, making diagnosis less obvious.
When Professional Help Makes More Sense
Professional help makes more sense when the leak is recurring, the chimney masonry is damaged, flashing is loose or rusted, interior staining is spreading, or the chimney sits in a hard-to-access roof area. Professional inspection is also a good idea if previous caulking repairs have failed.
A mason can assess the chimney brick, mortar, crown, cap, and masonry joints. A roofer may need to assess shingles, underlayment, roof decking, and flashing integration. Some projects require both trades because the chimney and roof system meet at a single weak point. The best repair is often the one that respects both sides of the problem.
If the chimney shows more widespread masonry deterioration, A&A Masonry’s guide to common masonry repair issues in Toronto can help homeowners understand how moisture, cracking, and aging masonry often connect.
Quick Decision Guide for Chimney Flashing Problems
A simple decision guide can help homeowners decide what to do next.
- Monitor and document if there is no active leak, but you notice early staining, slight sealant wear, or minor exterior concerns.
- Request an inspection if water stains appear near the chimney, the attic insulation is damp, or the flashing looks loose at the ground line.
- Avoid quick patching if the same leak has been sealed before and keeps returning.
- Consider masonry repair if mortar near the flashing is crumbling, bricks are spalling, or the chimney crown or cap is damaged.
- Act sooner if the leak appears during snowmelt or heavy rain, because repeated moisture can spread quickly.
- Check permit guidance if the repair becomes a larger chimney rebuild, roof alteration, or structural project.
The main question is not “Can this be sealed?” A better question is “Where is the water getting in, and what detail has failed?” That shift helps homeowners avoid temporary fixes that hide the real issue.
Final Thoughts on Chimney Flashing Problems and Fixes
Chimney flashing problems should be taken seriously because it is one of the most vulnerable points on the roof. When flashing fails, water can move behind masonry, under roofing materials, into attic spaces, and down interior walls. In Toronto and the GTA, freeze-thaw cycles, snowmelt, rain, and older brick chimneys make early repair especially important.
The right fix depends on the cause. Some flashing problems need minor sealing or adjustment, while others require new flashing, tuckpointing, chimney repair, roof repair, or better drainage behind the chimney. Homeowners should be cautious about repeated caulking fixes, especially when leaks return after every storm.
If you notice stains, damp attic areas, loose flashing, crumbling mortar, or recurring leaks near the chimney, the safest next step is to have the full chimney and roofline detail inspected. A clear diagnosis can help you choose the right repair before a small leak becomes a larger home repair problem.